This week’s letter is a long and detailed essay about developing my drawing process (with lots of pictures) based on progress I have made in the last few weeks.
Regular Third Something readers will know filling sketchbooks is my only goal for the year (just as well, eh?) building on earlier progress I shared with you in letters #17, #22, #32, #45 and #53.
The goal is to build a daily habit of drawing, hopefully improving my technical skills while also getting better at observing the world around me and using the page as a place to think. I want to end the year with a big pile of finished sketchbooks!
A couple of weeks ago, after a lot of frustration, I tried a new approach to drawing dynamic figures which has encouraged me enormously.
Before I begin, I should say I am not a trained artist, just an enthusiastic amateur. This process, new to me, won’t be new to the professionals among you (of which I know there are a few), but hopefully it will be inspiring or helpful all the same!
The Sketchbook Problem
First of all, the frustration.
A sketchbook is supposed to be a place where an artist (of any kind) can play, experiment and practice. It is a place for quantity not quality, a place where we can build momentum that might lead to a finished piece.
It is not supposed to be a place for finished works and it is not really supposed to be seen by other people.
As it turns out, this is difficult.
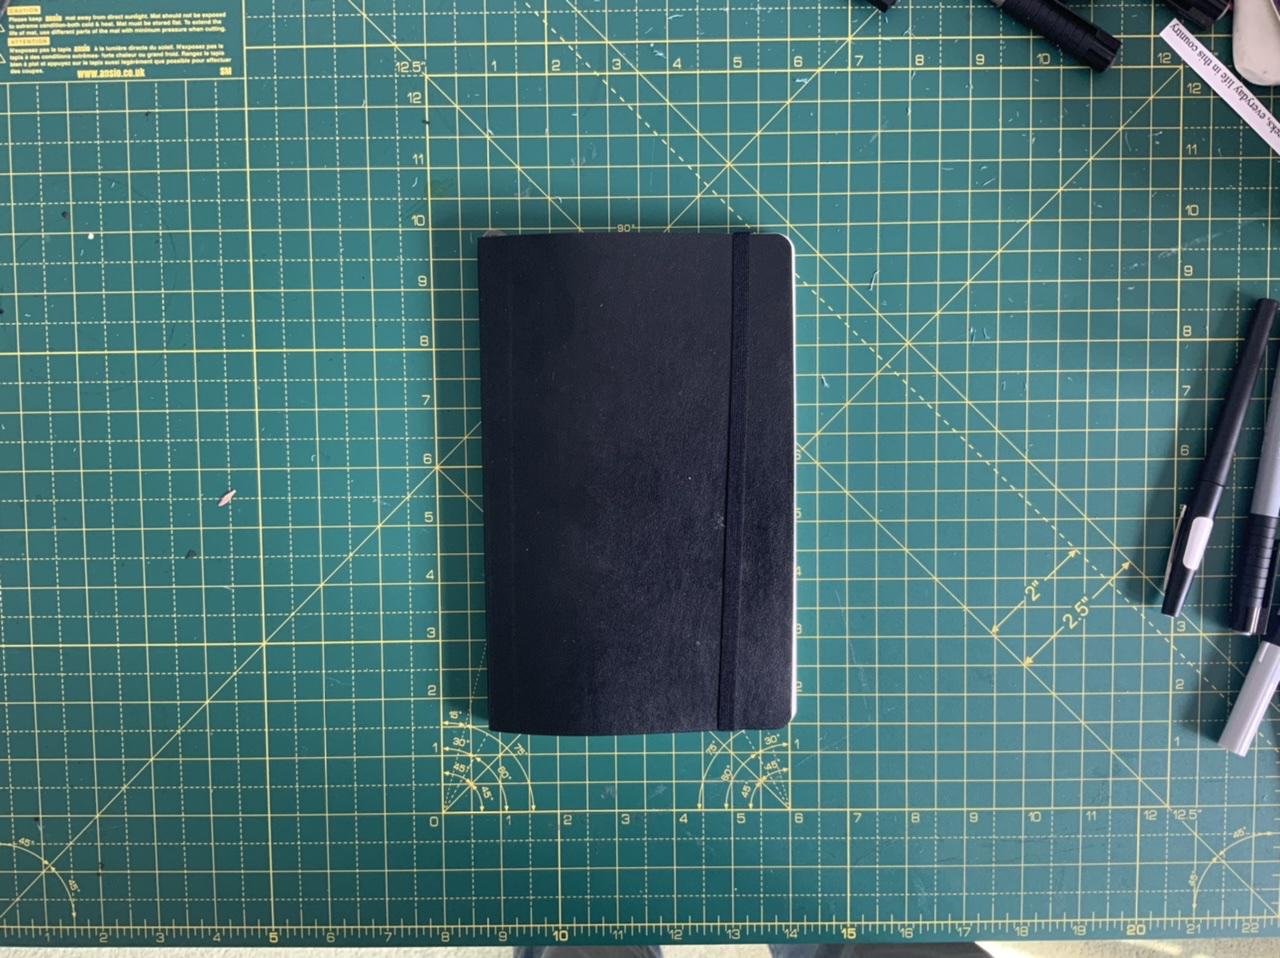
The first thing many of us do - myself included - is buy a nice shiny Moleskine notebook. These cost at least $20 and are carefully made with lovely smooth high-quality paper.
Big mistake.
The second thing we do - again, guilty-as-charged - is buy into this social media culture of sharing pages from our sketchbooks. Search for the hashtag #sketchbook on Instagram and you’ll find 46.1 million (that is 46.1 million) photographs people have taken of their work.
Bigger mistake.
Thirdly, through no fault of their own, sketchbooks are finite, creating a scarcity that gives each page an intimidating value.
And so turning to a pristine new page in my lovely Moleskine, my phone on standby to take a photo…I become paralysed. The marks I might make will be final, the drawing needs to be as good as those 46 million others.
So when it falls short, I feel demotivated.
My Moleskine is not a sketchbook anymore, it is a space on a gallery wall, open to the public.
And that’s The Sketchbook Problem. If you don’t feel creatively free in your sketchbook, then where can you?
The Paper Sandbox
When I realised this problem a couple of weeks ago, an obvious solution instantly presented itself.
I leapt up and eagerly marched to my local supermarket. Then I stood in a line two metres away from the person in front of me for twenty minutes because that’s the world we live in now.
Once I was inside, I ran to the stationary section and grabbed the biggest, cheapest pack of plain A4 paper I could find.
Then I marched home and washed my hands for twenty seconds, after which I grabbed a pencil, ripped out a few sheets and started scribbling.
And reader, I finally felt free to play! This cheap thin paper wasn’t going anywhere other than the recycling bin so I had nothing to lose; meanwhile there is so much of it I can scribble with abandon.
Is it strange that I need a pre-sketchbook for my sketchbook? Probably. But I needed some kind of staging ground, what in the tech world they call a Sandbox environment
But I wasn’t expecting what happened next.
The Active Drawing Process
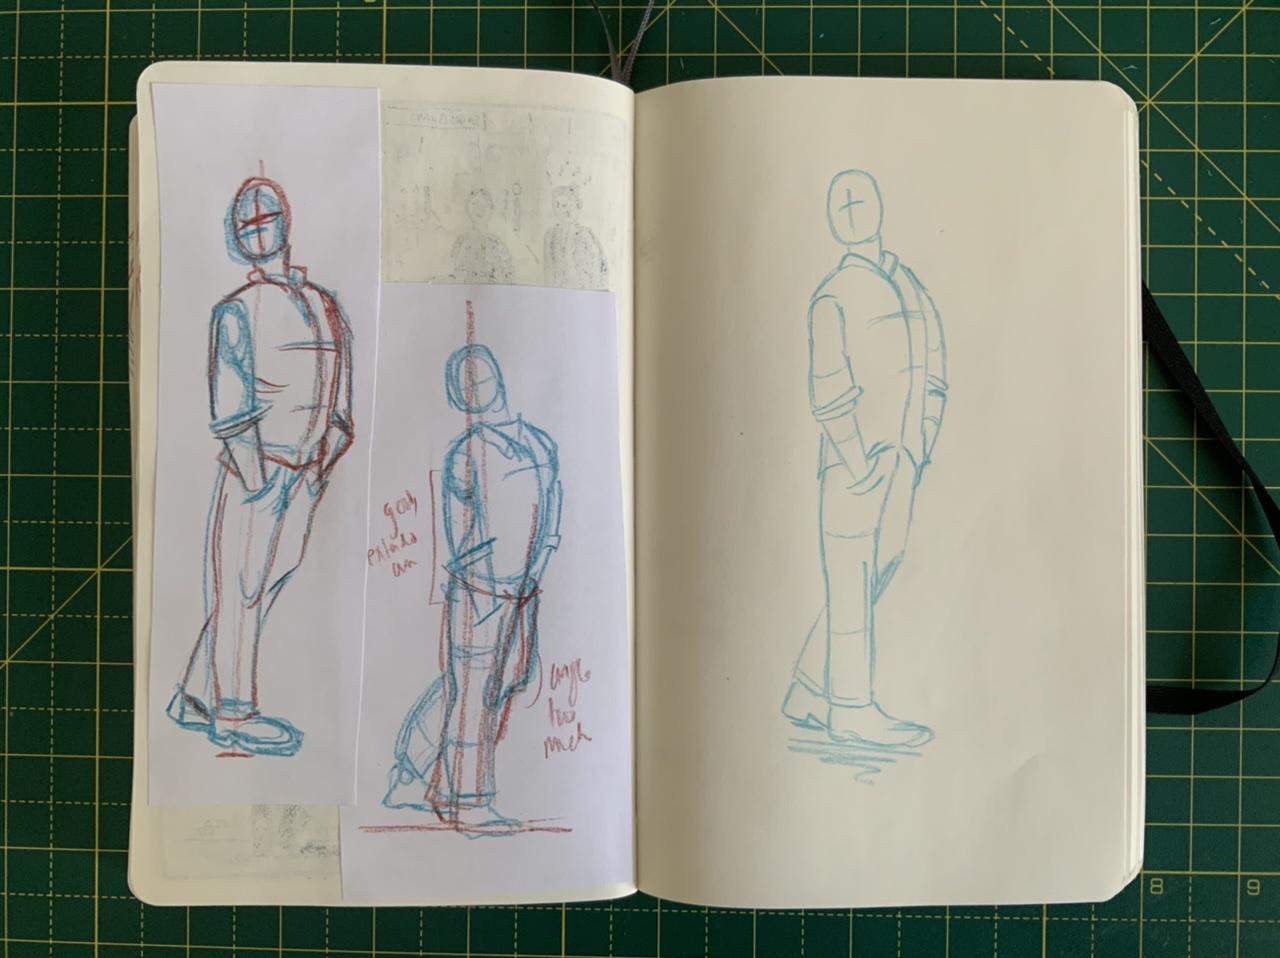
Sitting down with some loose sheets of paper in front of me, I began drawing lightly in blue pencil. I had spent the day before carrying heavy delivery boxes up some stairs and thought it would be a challenge to try and recreate this pose on paper: a figure carrying some heavy boxes.
Working very quickly and lightly I sketched out parts of the figure I could see in my mind’s eye: the chin tilted upwards, the shoulders pulled down by the weight of the boxes, the knees bent - that’s the first sketch in the photo below.
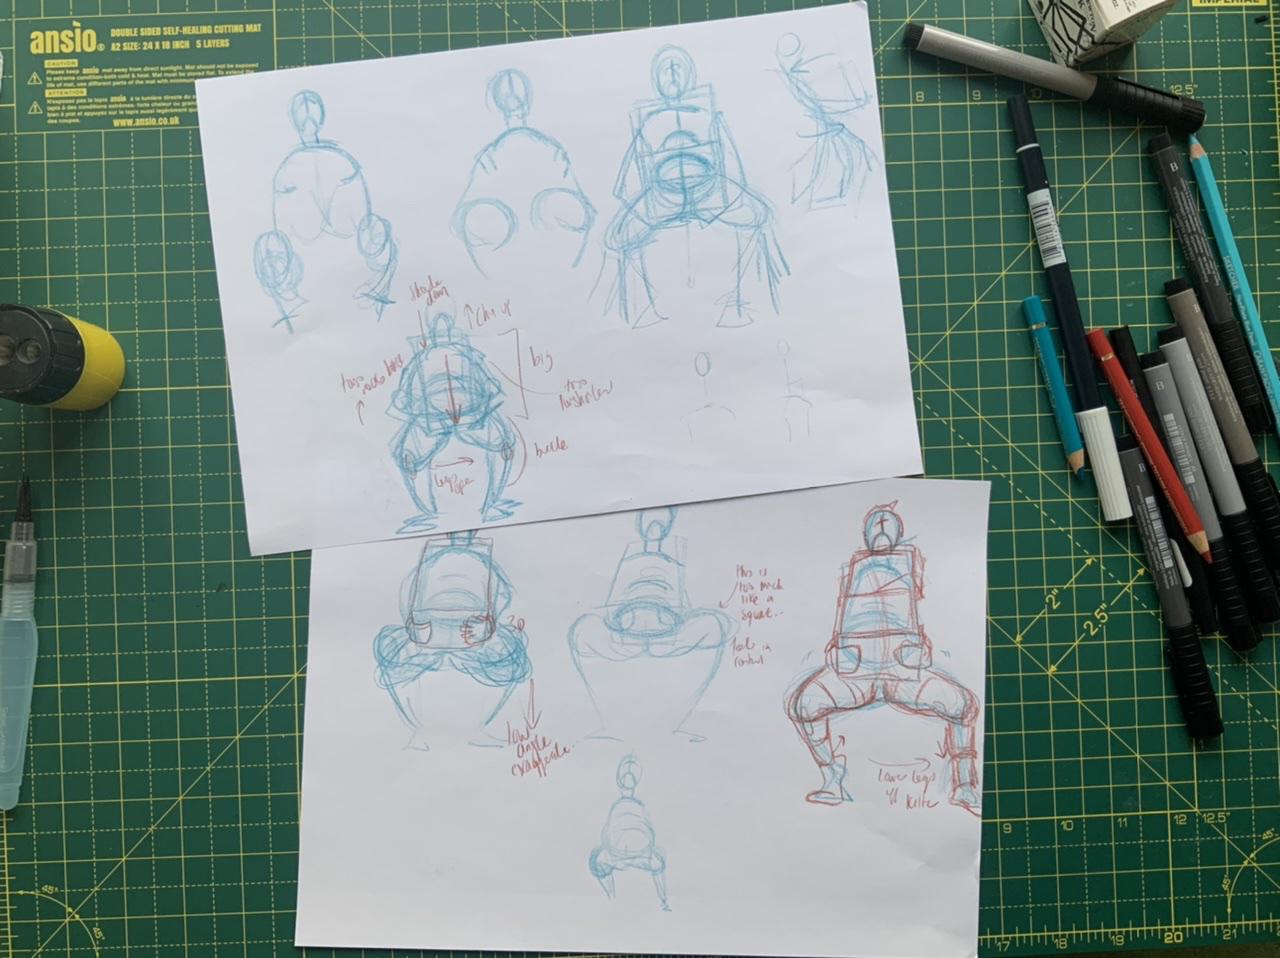
Some bits I liked, but wasn’t good so - with all this space I had - I immediately drew it again. This time, I realised the legs were bent too much - the figure looked like he was squatting.
So - why not? - I drew him again! I made the legs longer and tried to figure out the arms. This time I got as a far as indicating the boxes he was carrying.
You can see in the top-right image above that I also tried to draw him from the side.
And this was the moment something switched in my mind
I drew that side profile because I wanted to figure out the shape of his back: what angle should his spine be tilted? I wasn’t drawing to make a pretty picture, I was drawing to discover the pose.
So when I drew him for a fifth time I began making notes on the sketch: his shins should buckle, his torso should be foreshortened; we should be low down, to exaggerate the weight and size of the box.
I pulled out a second sheet of A4 and drew him yet again, applying those changes. Now my line work is getting more confident. The angle of his thighs is still a problem so in drawings seven and eight I try two different angles. In the eighth pose I try putting his shins at odd angles to make him feel more unstable.
And it looked good! I wanted a clean version in my sketchbook, so I just traced this eighth drawing in. At the last moment put the second box at an uncomfortable angle and lightly indicated the wall at a dutch angle to make him feel even more unstable.
And here is the final result:
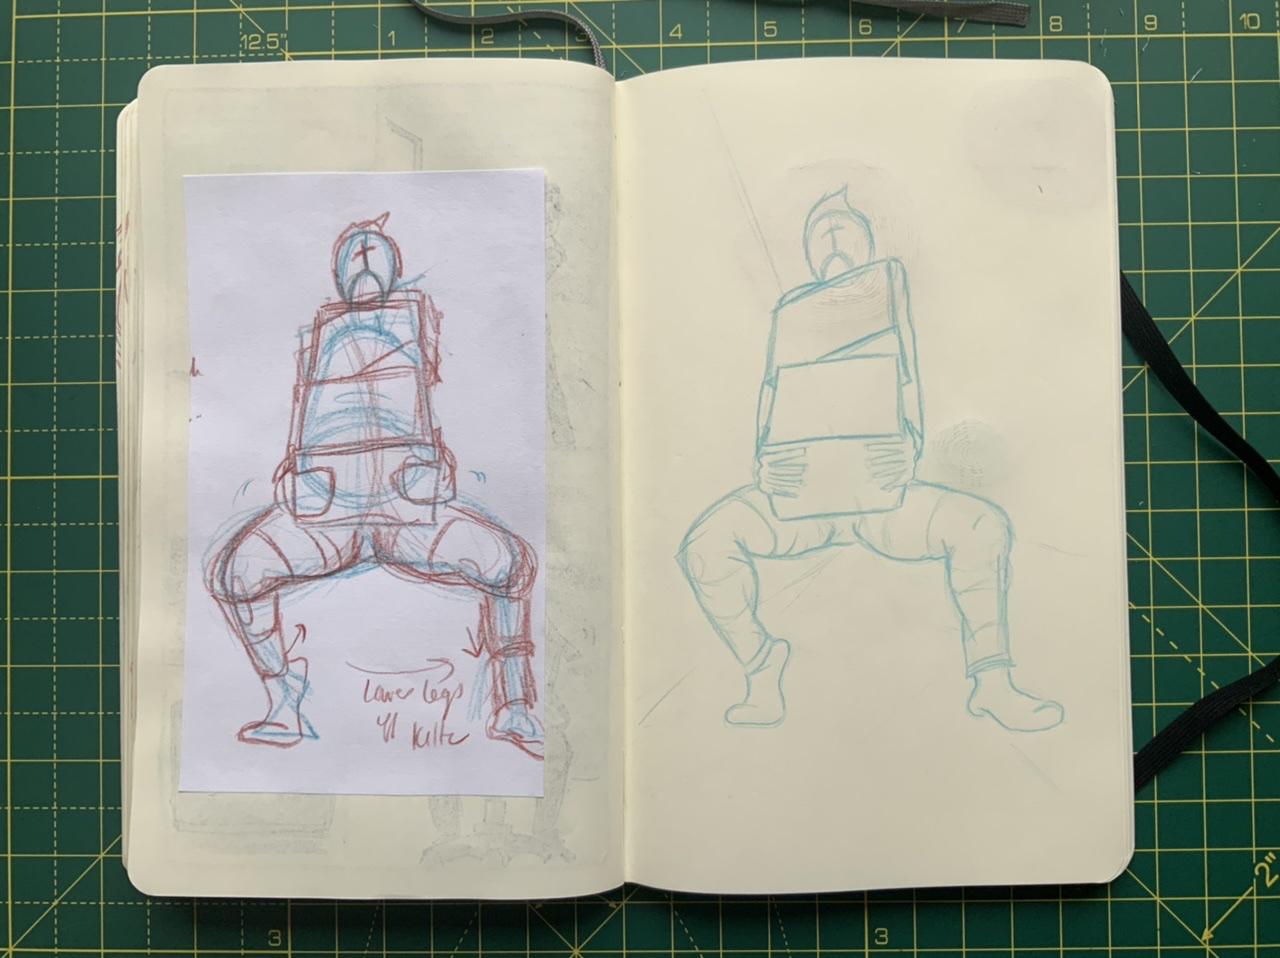
Not amazing but well-proportioned and those boxes ‘feel’ heavy, right?
Here’s the key takeaway - in order to get to this one drawing I am proud of, I drew it nearly a dozen times beforehand. I needed to rehearse the performance, improving it incrementally each time
This is an active approach to making images.
I am not drawing blind, hoping the end result will be good. I am drawing fast and loose, making mistakes, identifying those mistakes, then drawing again. Rinse and repeat.

“Hang on a second, is Adam writing a big long-winded essay to say…practicing is good?”
I guess I am, but this is why I said up top I am not a professionally trained artist. In my amateur mind, you draw and hope it is good, and if it is bad you feel disappointed and give up.
This process is revelatory (for me) because it says it is OK to do bad drawings (lots of them!) as long as you learn from them. It is active practice
Here are some others I’ve done over the past few weeks, using the same method.
These were all drawn from my imagination without using reference photos. Each finish outline is preceded by eight or more rehearsal sketches.
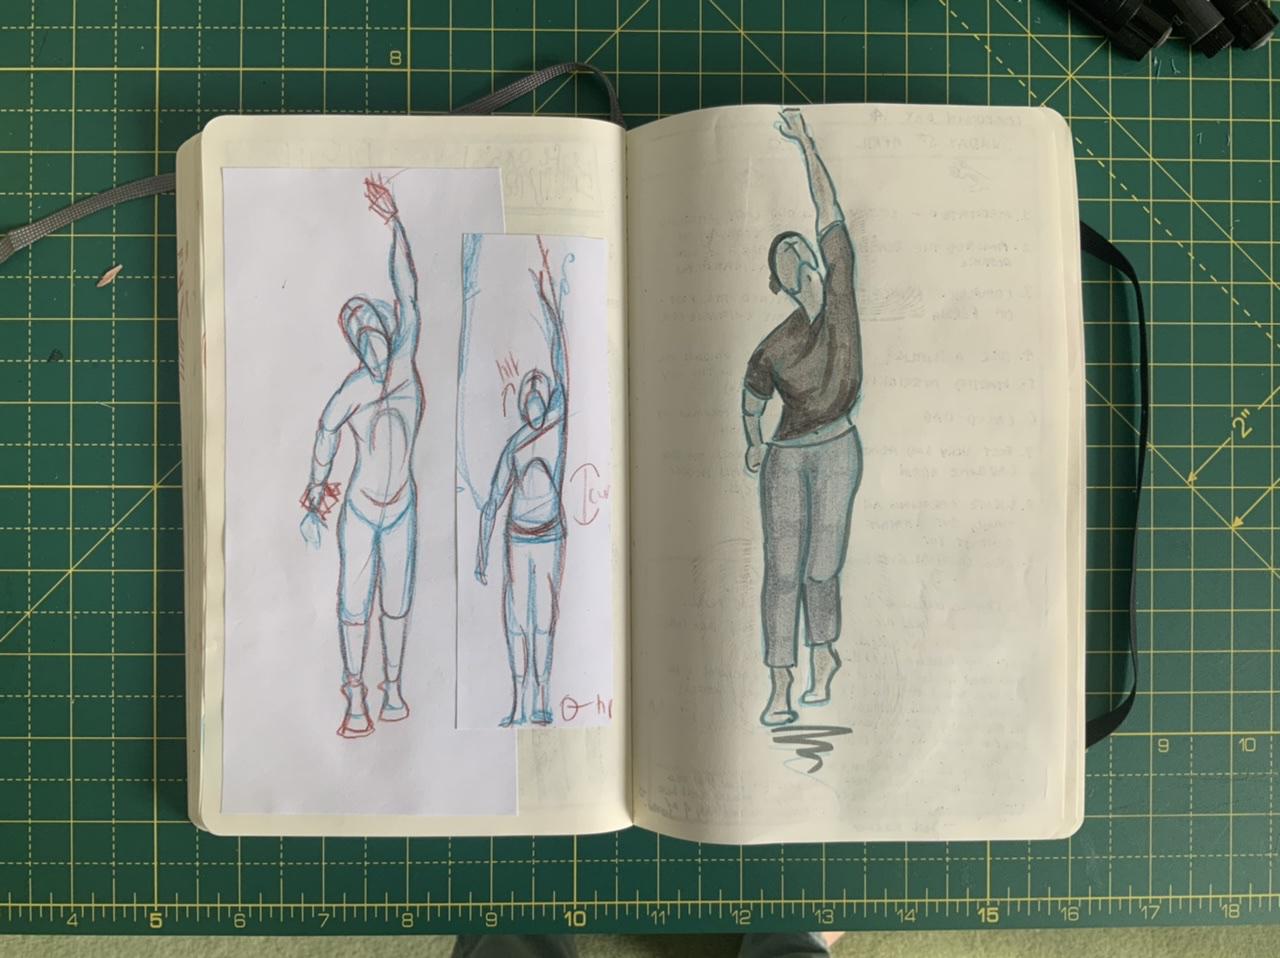
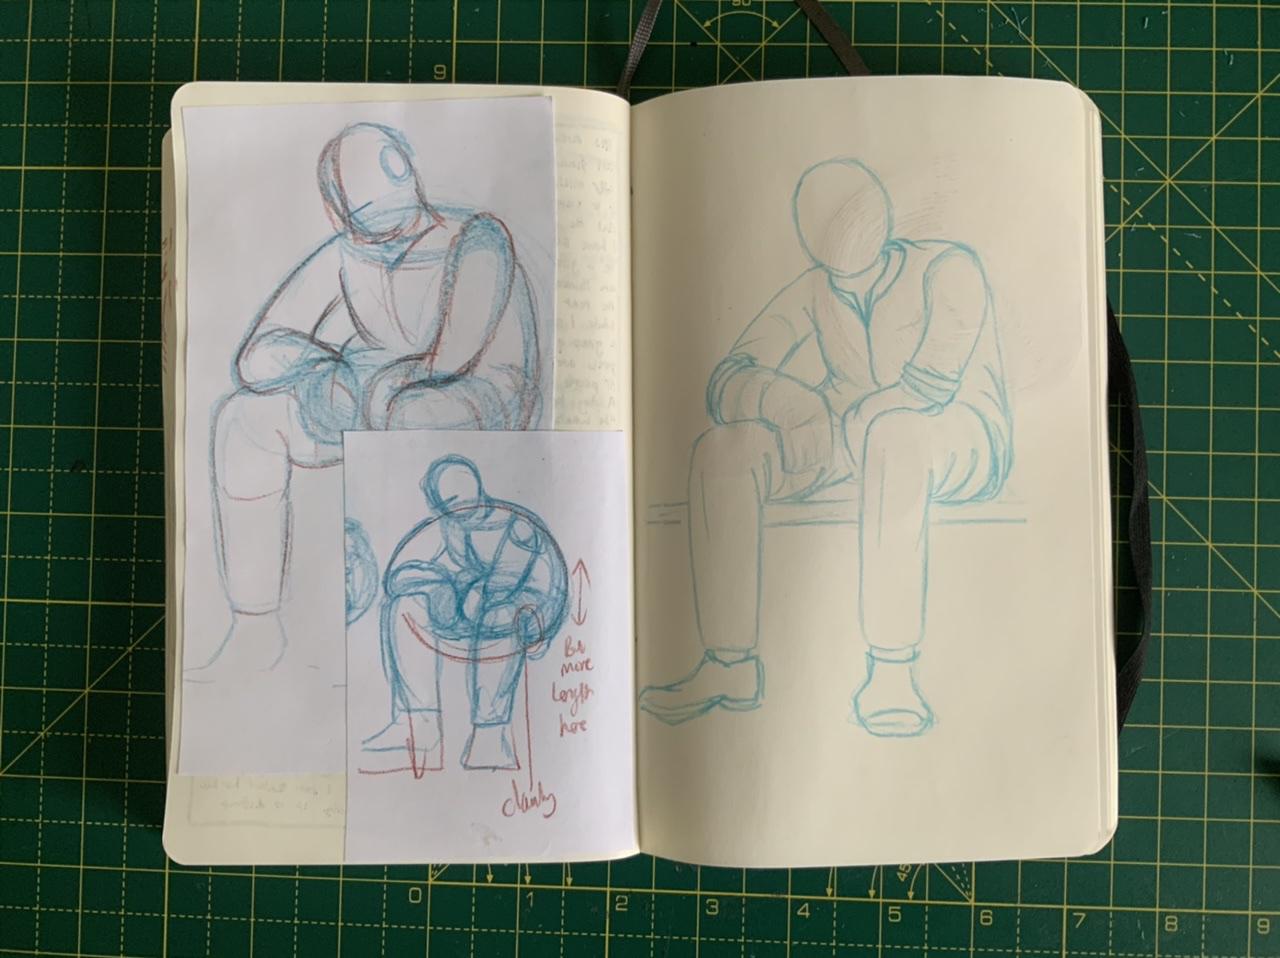
You can see I haven’t figured out how to trace and outline these drawings well.
The rough sketches feel more ‘alive’ than the clean tracing on the right. But I’ll get there.
Improvising On The Page
Finally, this process works great as a form of improvisation.
Improv is a powerful creative tool because it requires letting go of results: you start without knowing what you are going to draw.
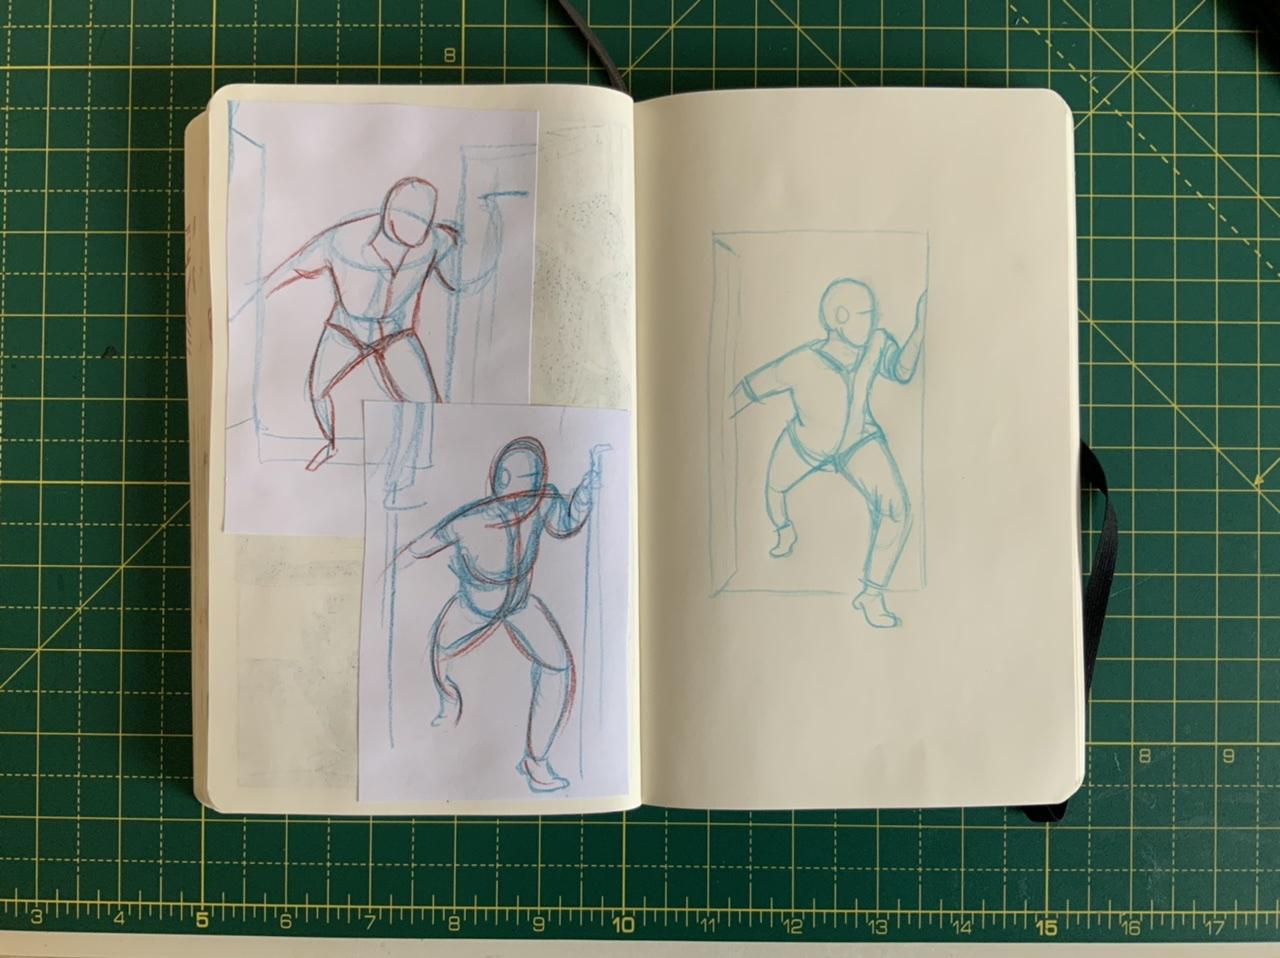
On Friday morning I took a clean sheet of my cheap A4 paper and began sketching a figure. I did not know what I wanted to draw, so I just let my hand lead the way.
My first drawing is a man running towards the viewer, leaning forward like a Marvel superhero (Fig. 1, below).
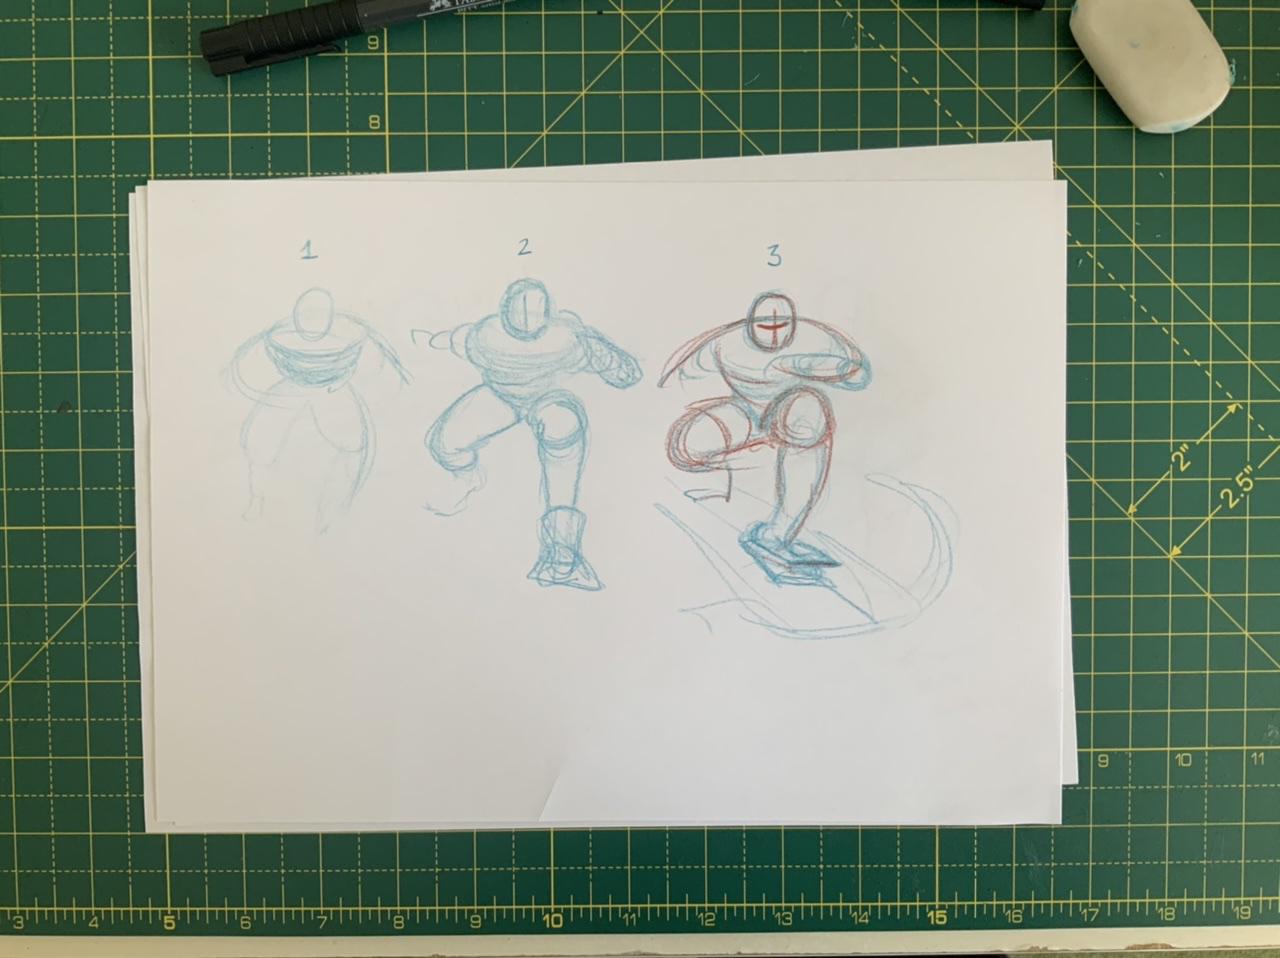
I immediately re-drew the figure right alongside, this time trying to work out what the legs were doing (Fig. 2). The back leg looks alright but the forward leg is too straight and at an unnatural angle.
So I drew him again, copying the back thigh but curving the front leg; I also moved his left arm more in front of him (Fig. 3).
Then I saw it - this dude isn’t running, he’s surfing!
I grabbed a fresh sheet and re-drew him for a fourth time, this time focusing on the surfing action. (Fig.4, below).
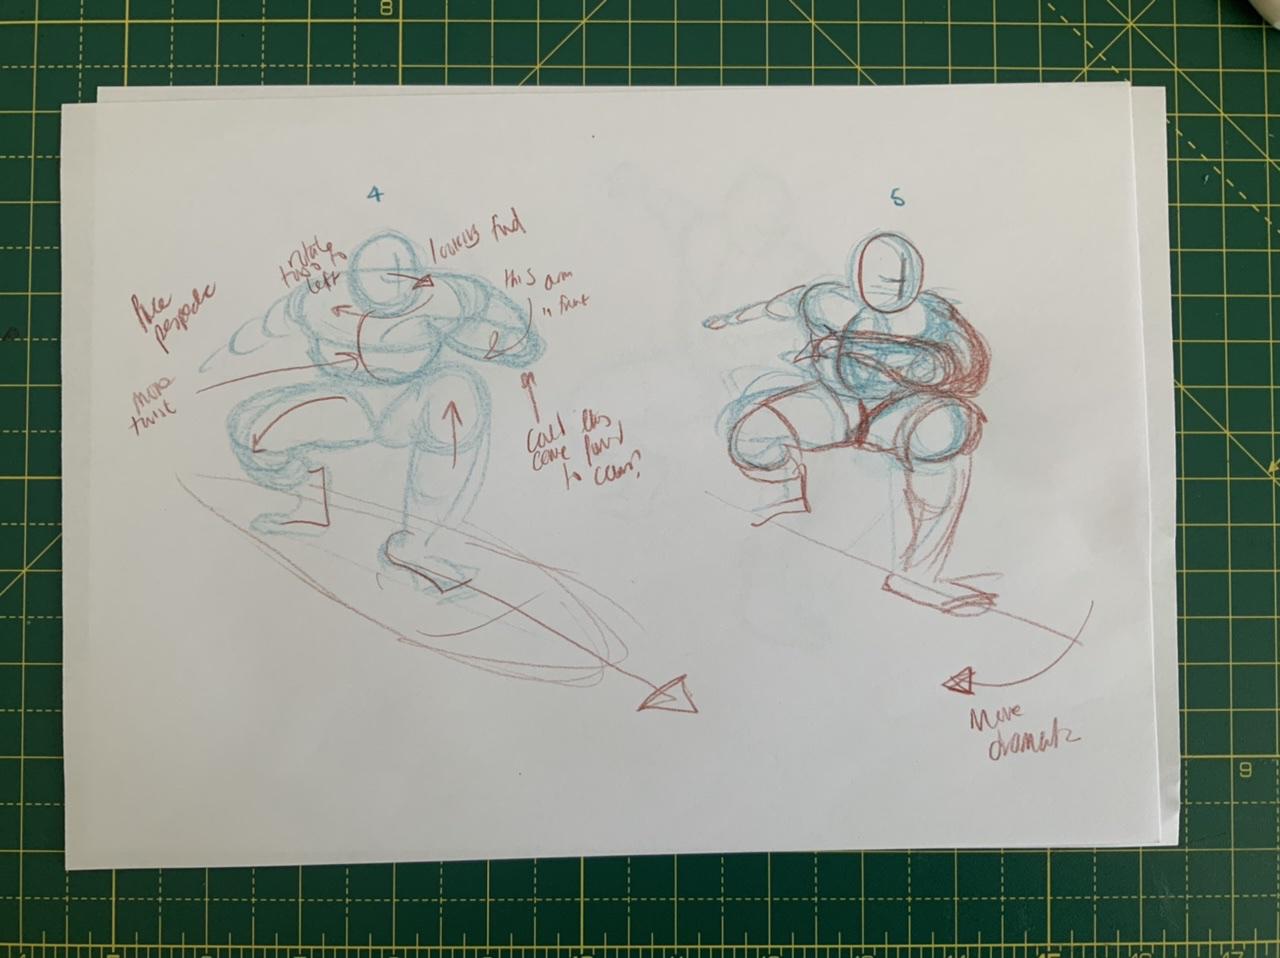
Now I know what I am drawing I can switch into the active analytical mode. I see his torso wants to twist - his chest and head should face forward, while his hips are aligned with the length of the board.
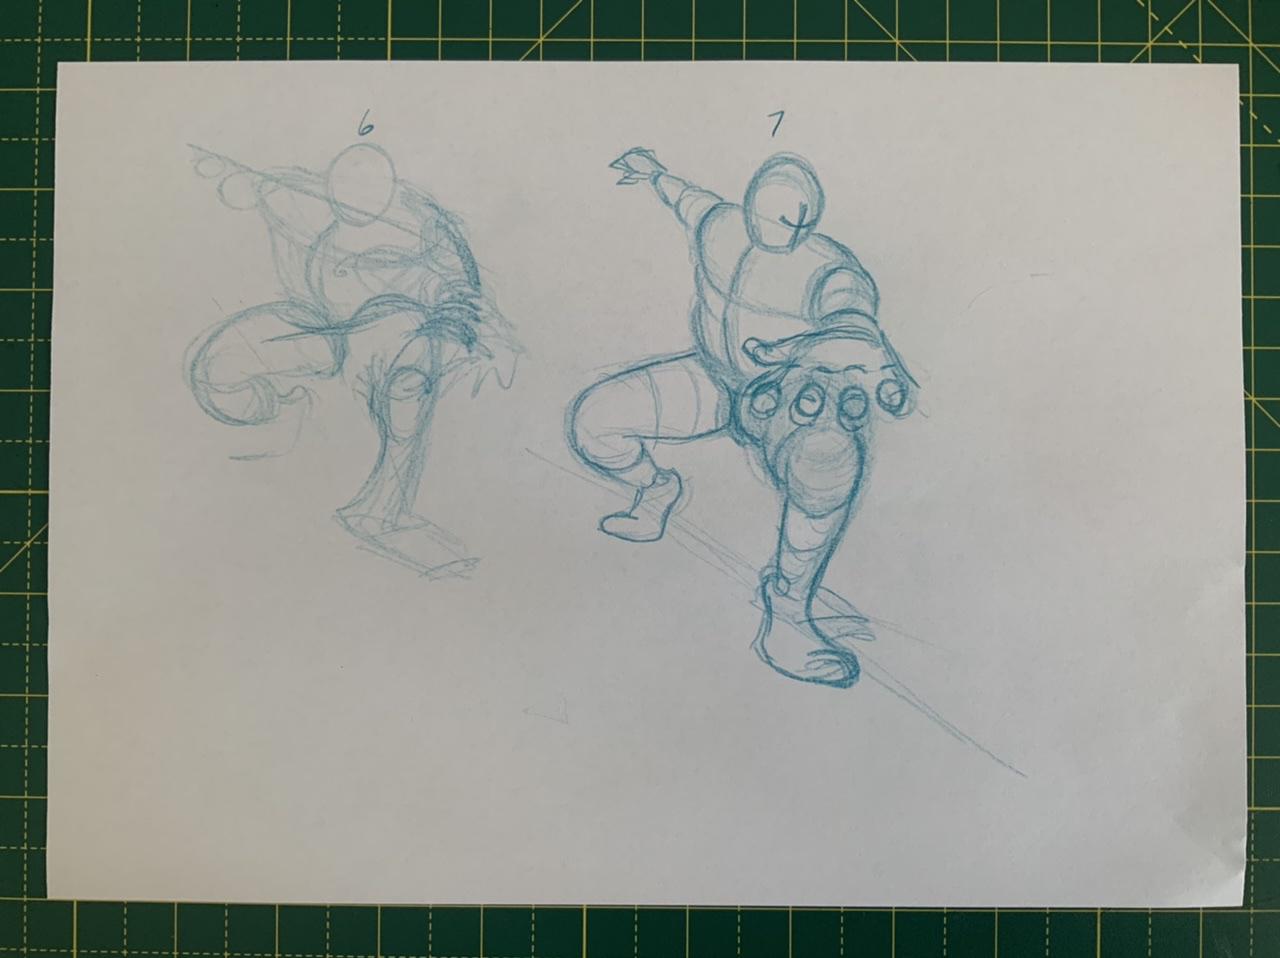
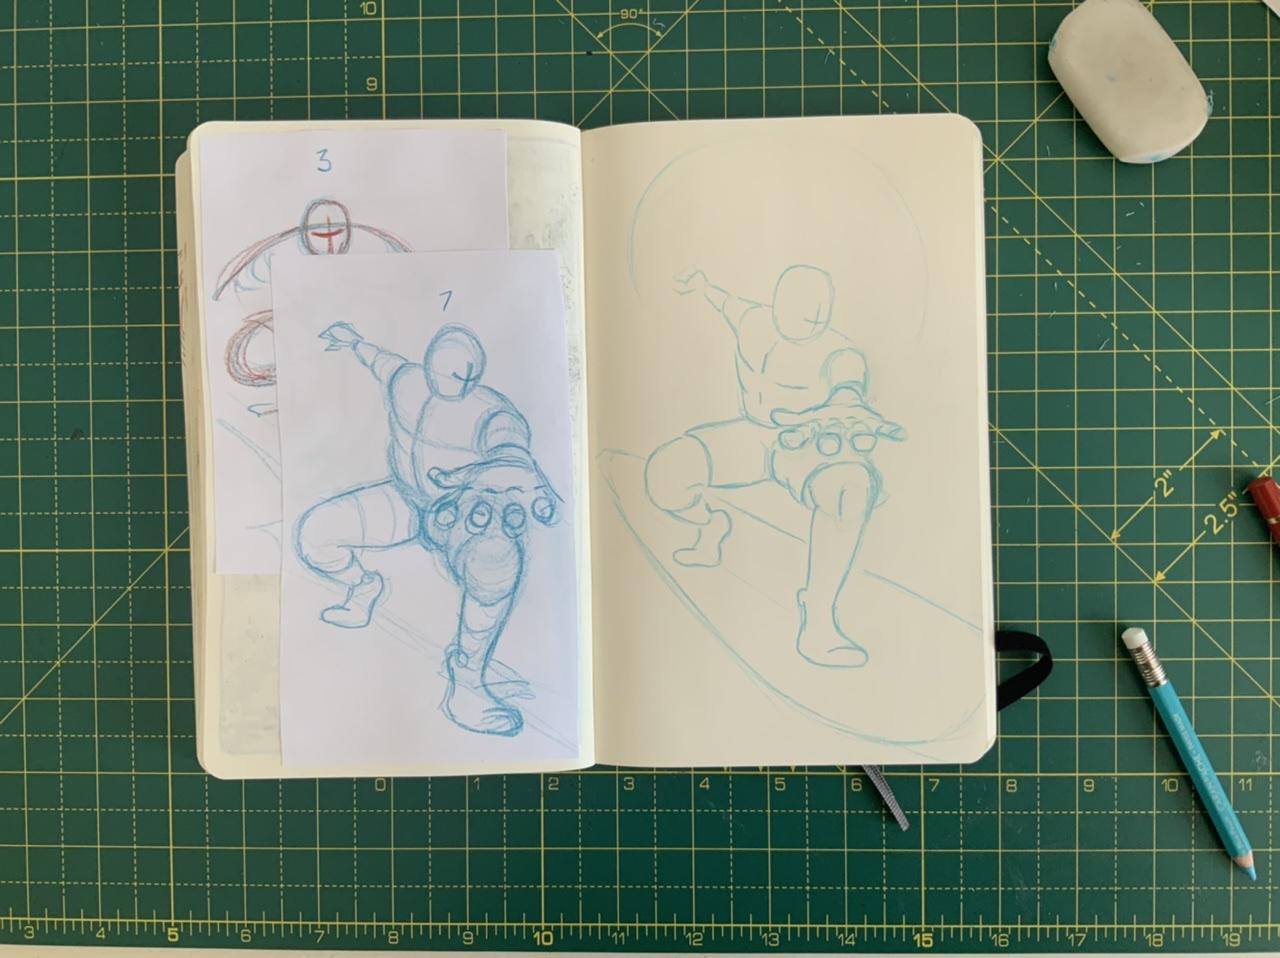
I redraw him several more times, each time working quickly, making rough shapes and loose lines, absorbing the lessons from the analysis and making improvements. By the third page, I realise his left arm should be out in front of him to keep balance (Fig.6, below); I repeat one more time, exaggerating the perspective on the hand, and get a sketch I feel I can trace (Fig. 7).
The result is not perfect - the left arm and hand need more refining - but it’s pretty good for me, and not something I expected to draw!
Summary
Maybe you’ve seen Matthew Inman’s Ten Things I’ve Learned About Creativity In Ten Years comic.
Early on, he talks about how he used to view his eraser as proof of his inadequacy, evidence he had made a dreaded mistake and had to go backwards.
“…The more I erased the less of a real artist I was. I felt guilty about using Ctrl+Z on my computer…I was ashamed of my process, I was ashamed of my eraser.”
Eventually he discovered the drawing process is “exploratory and iterative”. Mistakes are good!
Here is the step-by-step process for drawing dynamic human figures I have described today:
- Identify the pose (unless you are improvising, in which case just start making marks).
- Describe the pose as an active verb, the more emotive the better. So instead of drawing someone ‘walking’, aim to draw them ‘strolling’ or ‘marching’. This will help you figure out what to exaggerate and what to background.
- On a sheet of the cheapest paper you can find draw that pose quickly. Draw fast and loose making multiple strokes for each line. ‘Feel’ the pose.
- Without pausing, draw it again, right alongside the original.
- Now analyse that pose. What parts of the body are working and what needs to change? Annotate the drawing, as it forces you to think actively.
- Draw the pose again. If something, a limb for example, is in the wrong place, don’t stop to erase it. Just draw it again over the top. You can use another pencil to clarify the line later. These early sketches will be messy, that’s fine.
- Repeat this process over and over. You will eventually find the figure starting to clarify itself. As you draw this pose repeatedly, your muscle memory will kick in and your line work will become more clean and confident.
- Once you have a rough sketch you think looks good, draw a dark clean outline over the top. Try to be specific about every line, especially hands and feet.
- Trace this outline into your sketchbook or wherever you want to keep it.
- Scan, ink or do whatever you fancy doing with your sketch!
I have received emails from Third Something readers who say they have been inspired to start drawing again having seen my attempts.
It is wonderful to think that just by picking up a pencil myself - and through the magic of the internet - other people are doing it too.
So I hope this admittedly long essay encourages even more of you to pick up a pencil, knowing that the secret is not innate talent, but the indisputable brute force of practice.
Until another Sunday soon,
